
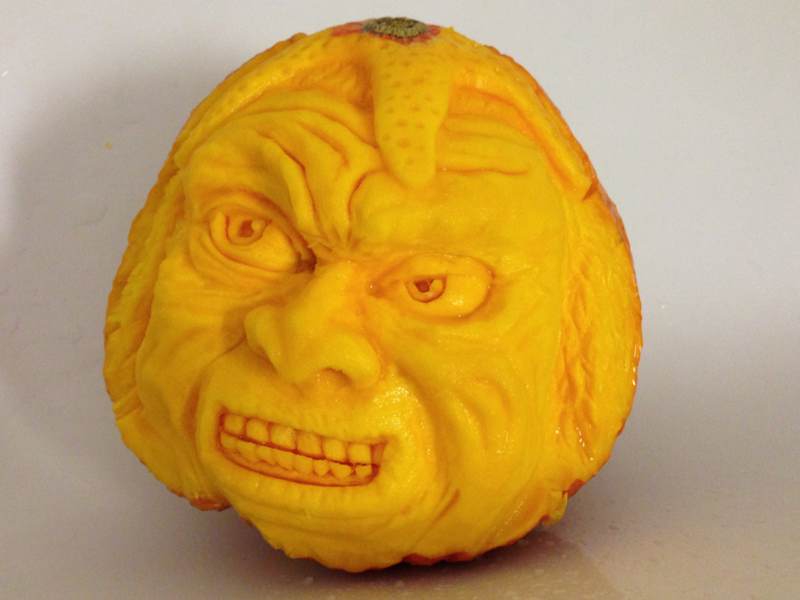
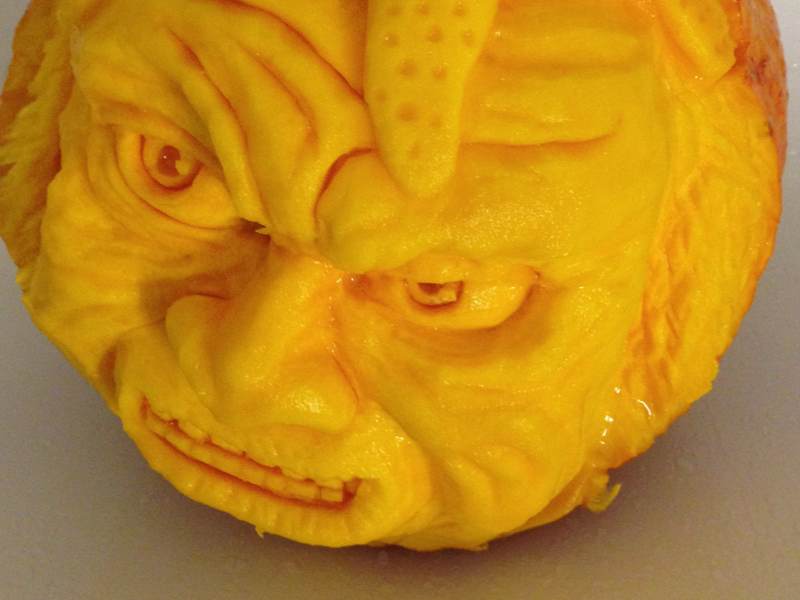
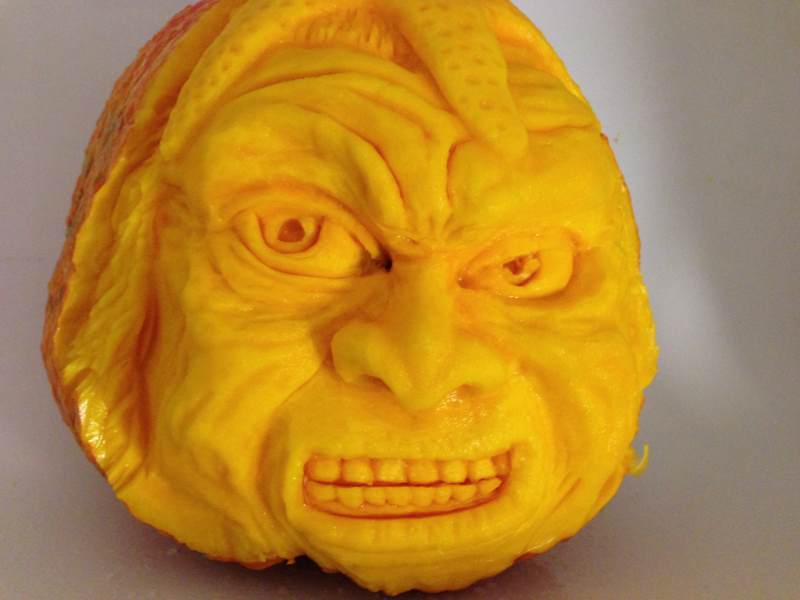
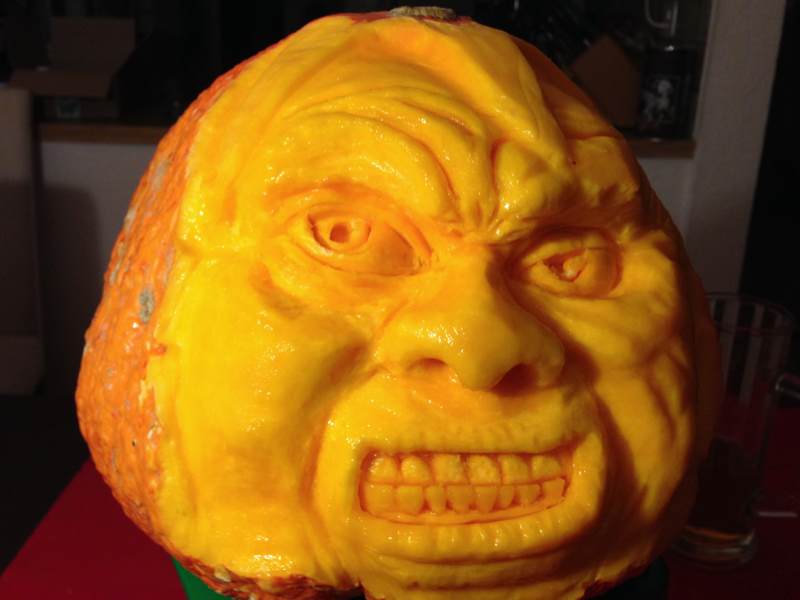
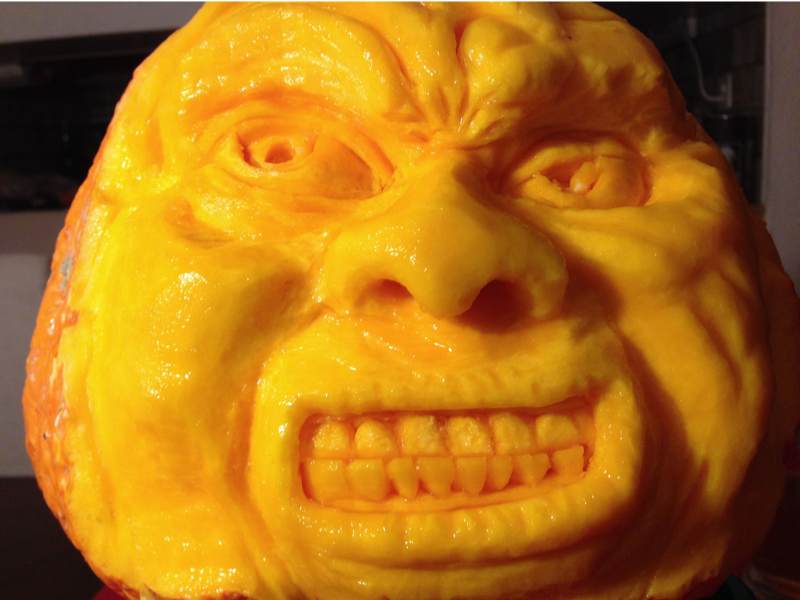
Starfish Pumpkin
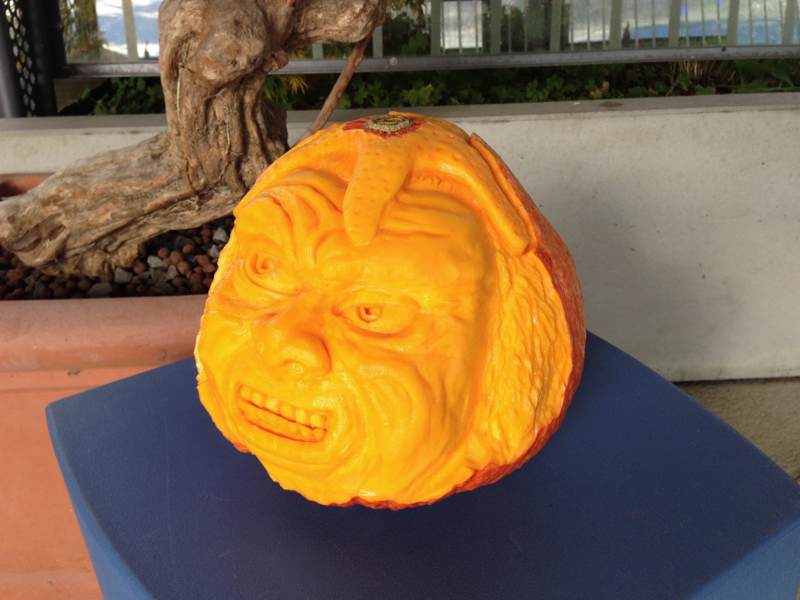
The Starfish Pumpkin (November 2013) was created as a surprise display at my current employer’s entry hall. Our Company logo contains a starfish, so it was pretty obvious that this had to somehow show up in or on the carving. I went for a starfish cap, which turned out to be a good decision with the pumpkin’s trunk sticking up in the middle of the head.
The win-win situation I aimed at worked out quite well.
My company had a personalized surprise Halloween pumpkin. And I was able to have my pumpkin being seen and pleasing more folks than if I had it on my usual place at home (the balcony, that is).
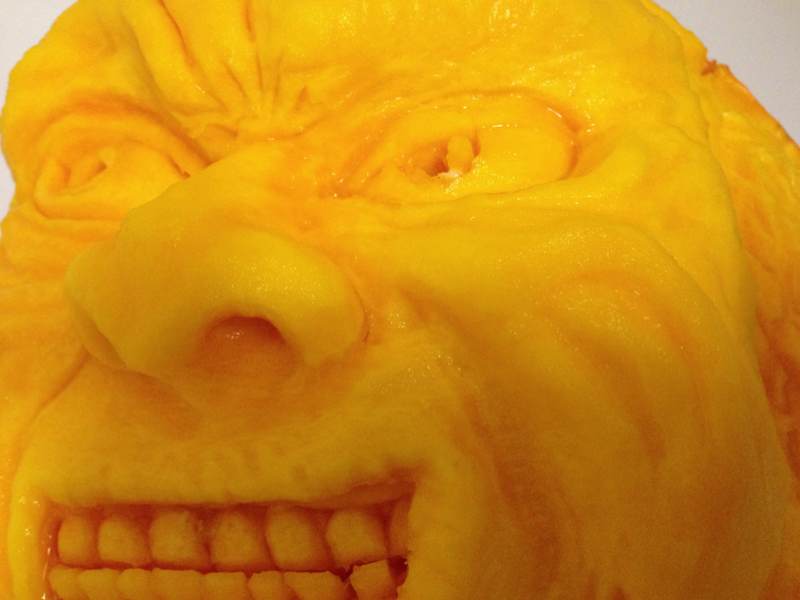
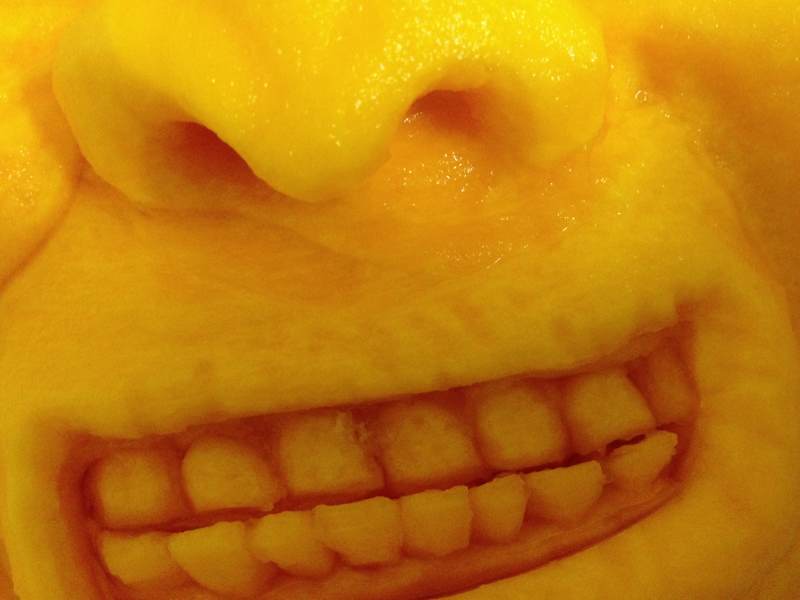
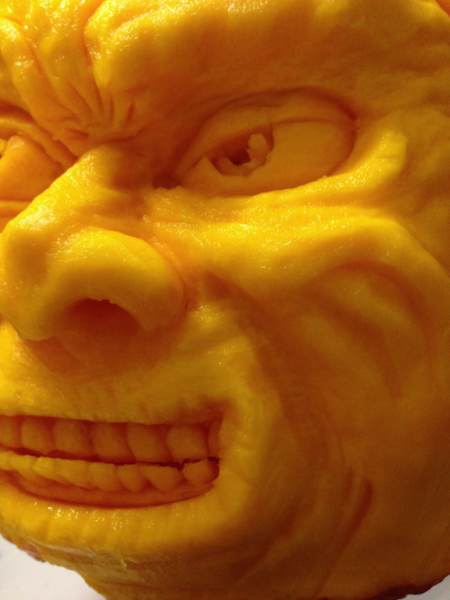
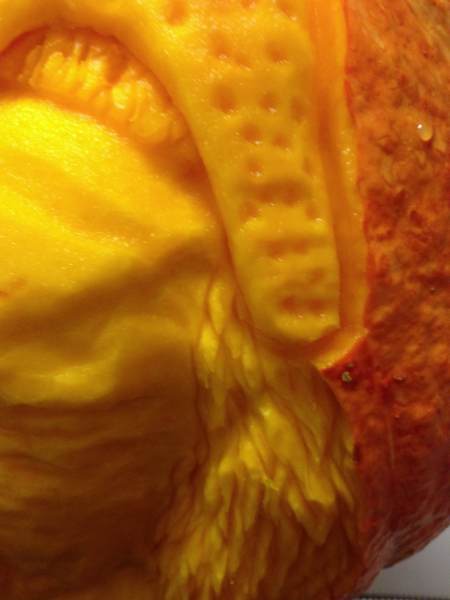
See some details below, just after final completion.


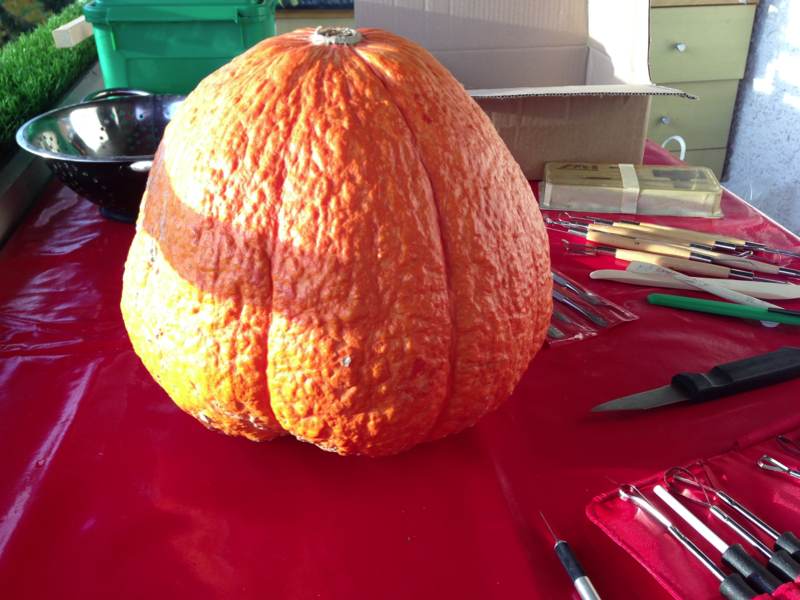
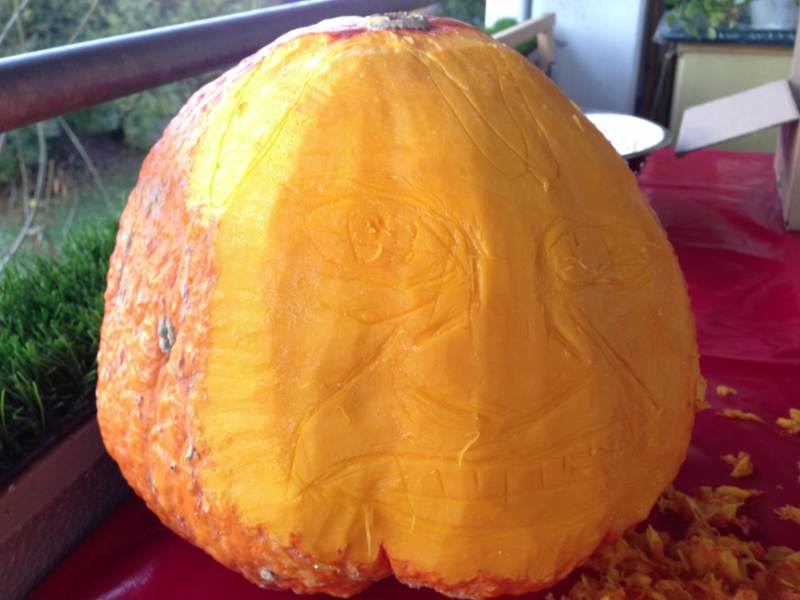
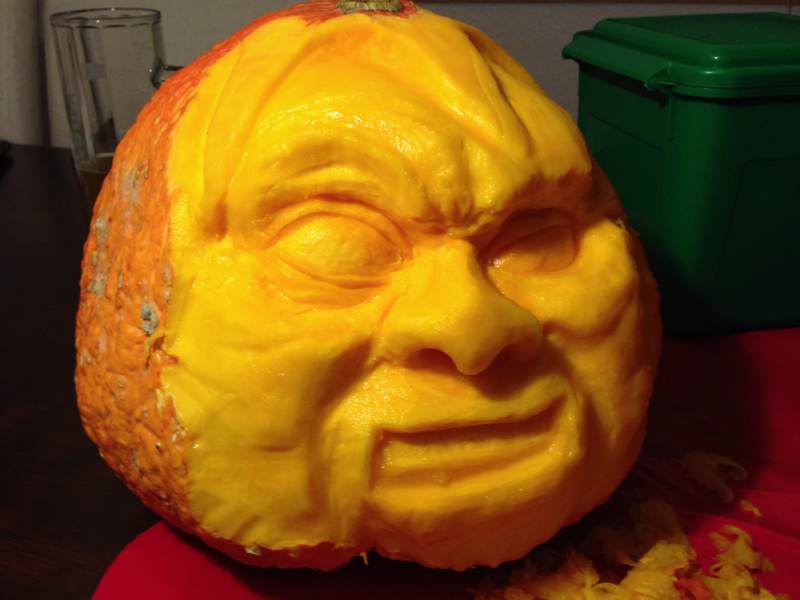
Making-Of
And here’s a short step-by-step process gallery


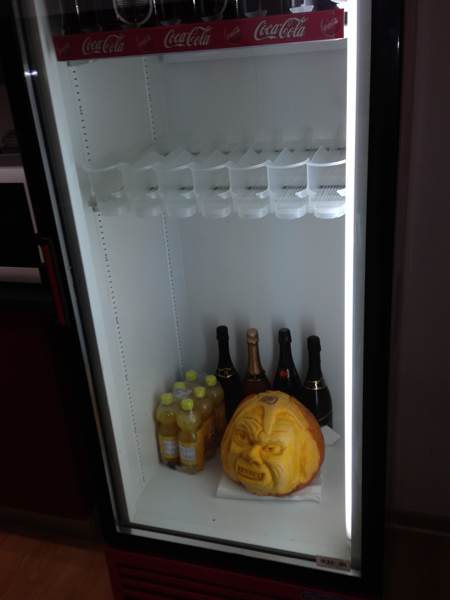
Storage (A Pumpkin’s Life Support)
In order to slow down rotting I rinsed and then put it in the fridge every evening before I left. Next morning I rinsed again, towel-dried it and set it back on it’s residence.
At least my little goblin head had some nice company from France at night. By the way they were hanging around in the lower corner of the fridge I figured they were local residents to the place.
A Good Tool Always Makes A Difference
It took about 3 to 4 hours to complete the pumpkin and was done with my new veggie carving tool set from Triangle.
I bought these fine tools from an Austrian company, triangle, and they are making a huge difference for carving anything 3d out of vegetables. If you feel serious about carving pumpkins, you really should consider getting those instead of regular knives or DIY sharpened clay modeling tools.
They’re on the expensive side, but take things to a whole new level as you may see from the detail shots.
Check out the tools post for info on the cutting and carving tools I used for this stuff.

Leave a Reply