
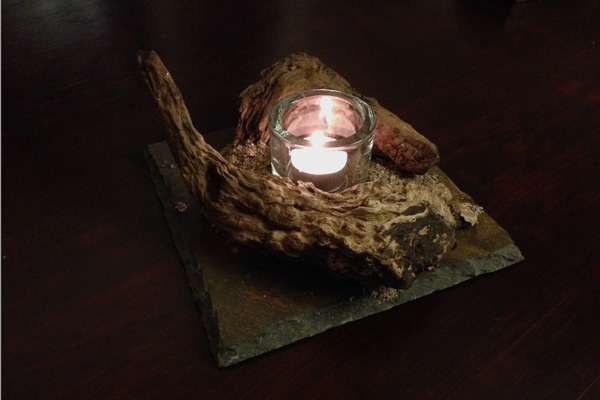
Driftwood Table Candle Light
As with many projects, this one finally got the initial kick by the fact that I needed a nice birthday present for a nice person (say “Hi” to Ursina :-)).
Just going to the store and getting something was no option, so I pulled a long simmering project out of my tray of ideas. That project was to have a couple of driftwood pieces sitting on some sand, enclosing a tea light candle.
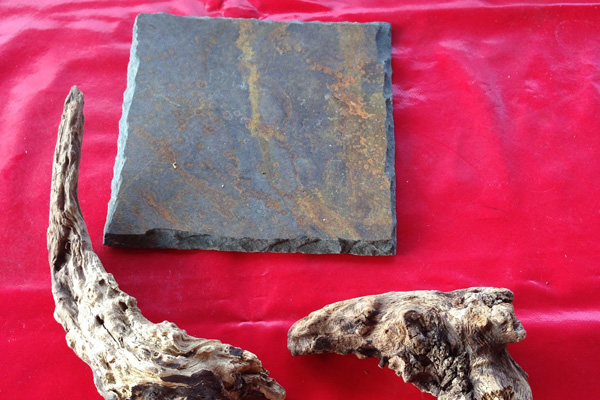
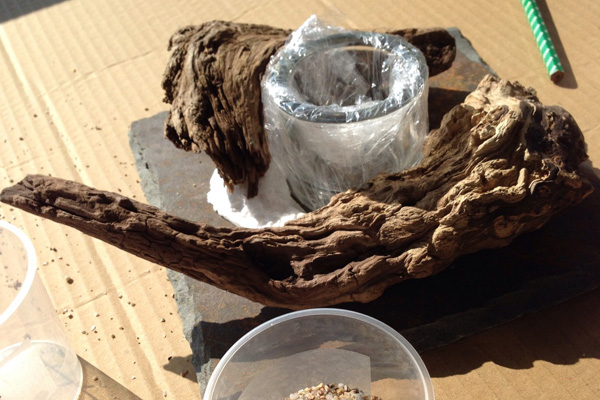
First, I got a nice slice of natural slate and found two fitting pieces of driftwood forming some kind of Yin and Yang. I knew Ursina would love this thing.
Next I drilled some holes into the slab, so the sand I planned to mix with 2K polyurethane resin would not bend off the slate. This step is kinda tricky, with much of contradictory information floating around the Net.
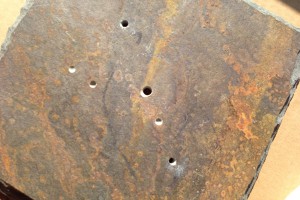
You’ll find people telling you that you should water the slate before drilling, so the stone becomes softer.
Don’t.
Fact is that the water also tends to soften the adhering capacities of the slate’s layers, so you have a good chance to split it horizontally…
Just use a stone drill, place some sort of buffer under the slab (I used a folded kitchen towel) and drill with *just a little force* applied. Don’t press too hard and take your time, after all the stuff you’re piercing did take some time to form too. Pay due respect to that fact also.
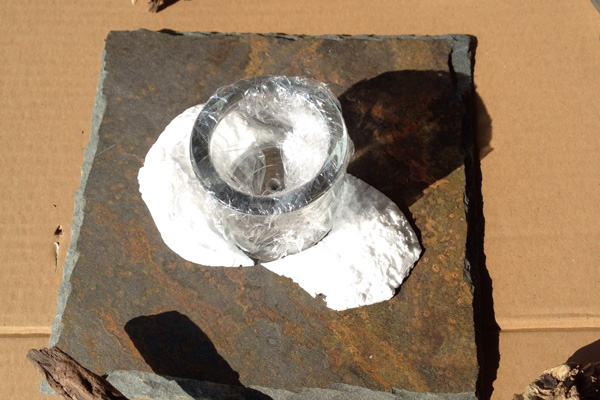
In an attempt to save some precious original Corsican beach sand, I then carved some rough representations of the would-be sand mounds, checking for the final layout, including holes to let the sand/resin mixture penetrate and reach the drilled slate holes.
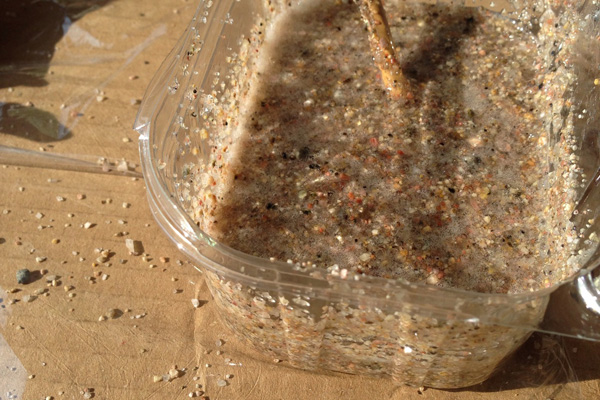
Mixing the very liquid PU resin and sand was quite an experience, since the stuff took quite some sand to get the gunky texture I was after. Almost run out of sand…
Then the resin mix was applied and a deliberate amount of dry sand pressed into the still wet mixture. If you don’t do that, the sand will look too glossy in the end. Next time I’d use the final sand spread a little more sparingly though, since too much of it may lead to quite big gaps in the final product once the excess sand is shaken off.
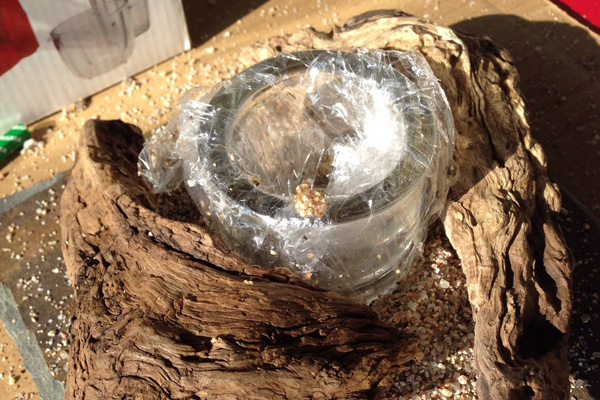
To prevent the candle holder from getting soiled with the resin mixture it was wrapped in some cling wrap foil. The candle holder was then shoved into place and the driftwood pieces positioned. The resin took about 2 hours to really settle.
If you ever want to do something similar, either use a fast curing resin (usually that stuff stinks quite a bit) or fixate your impressed items and just let it sit for a while.
Don’t start fumbling to see if it’s cured already, just let it sit.
Really.
Just chill, have a nice glass of scotch and a smoke (or a bottle of Calistoga Spring Water for all of you non-smoking non-alcoholics).
Well, that’s about it. Finally, remove candle holder, pull off the cling wrap and glue the wood into place. Since the top coating sand did not adhere to the wood, that was a necessity I didn’t expect. Anyway, I guess that the sand mounds look pretty realistic now, so that’s an adequate price to pay.
Some people I showed the piece on my iPhone didn’t realize it wasn’t just natural sand shifted into place. It’s quite funny if they start asking you “and how about if you want to stash the thing away? Doesn’t the sand run off?”
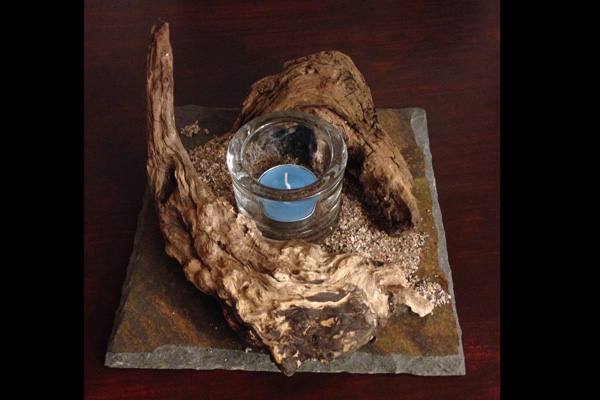
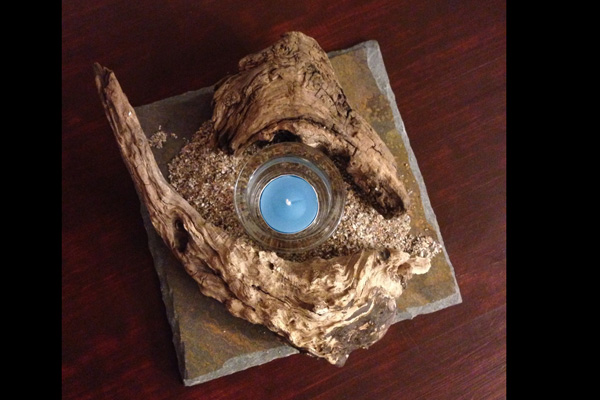
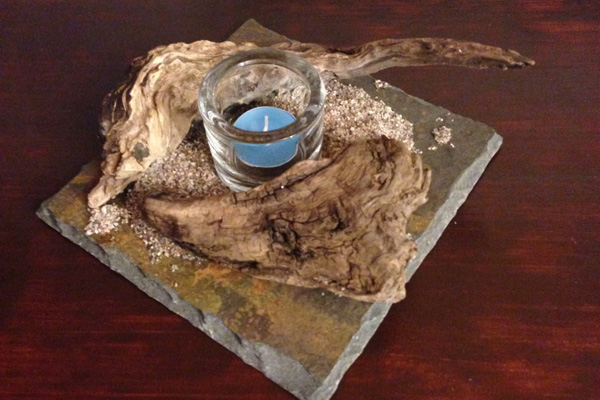
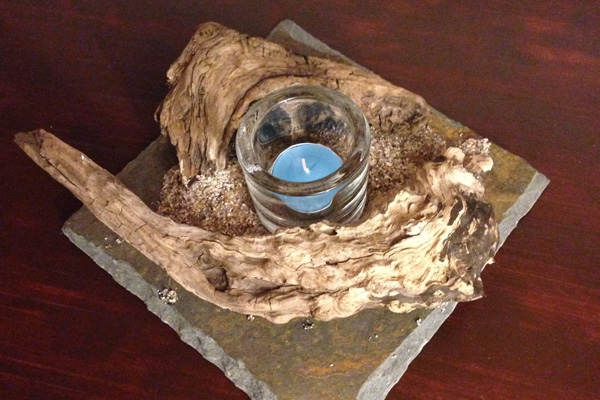 Well, finally insert an appropriate candle (my beloved wife supplied me with a gorgeous aqua blue one), carve a fitting piece of Styrofoam so you’re able to transport the whole thing and stuff it into a cardboard box to wrap it up as a present (optional)
And enjoy the happiness on the face of the person you endow 🙂
To me, that’s what I’m getting from it, and there’s no amount of greenbacks that can get the same effect for me (well, maybe if it’d get close to the current US debt it probably would…).
Spreading good vibes always reflects.
Sooner or later.
There’s no doubt about that.

Stay tuned.

Leave a Reply